Please find some samples of my tactile diagrams below.
Monkey puzzle
The following objects were handmade to help blind people enjoy the story which was converted into Braille.
Family of Monkeys
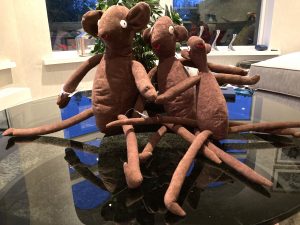
This picture depicts the Monkeys close up.
First the mum is shown on the left, the baby is in the middle and finally the father is shown.
Monkeys viewed from further away
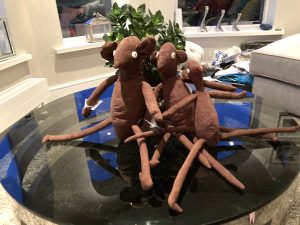
This image is like the one shown above. However, the camera is further away so the feet are shown.
All these monkeys are made of velvet with button eyes so they look like soft toys.
Snake/butterfly/frog
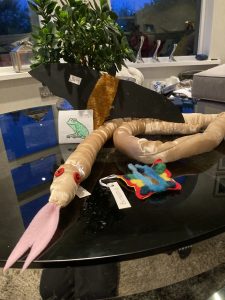
This picture shows three items which will be described as follows:
Snake
The first item is a snake, this is made from silk and has a pink tong sticking out.
Butterfly
The butterfly [the second shape in the image] was crafted out of needle felt it is multicoloured.
Frog
This raised image was produced on special paper, after the frog was drawn in black, it was then passed through a machine to create the raised diagram.
Braille and print labels were then added to all these objects so they could easily be distinguished by both visual impaired and sighted users.
Hairy Mclairy resources
These tactile images were based on the much loved Hairy Maclary series written by Linley Dodd. The text was transcribed into Braille throughout, furthermore a print copy of the modified text was provided to enable shared reading between visual impaired and sighted users.
Scarface Claw
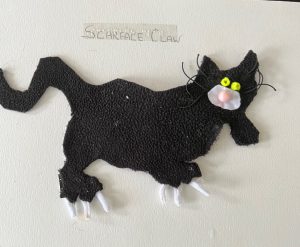
This cat was created using black velvet after the basic shape was formed, wadding was added to raise the shape off the page.
Pipe cleaners were used to replicate the sharpness of its claws as this is a very prominent feature in the original image.
Hairy Maclary
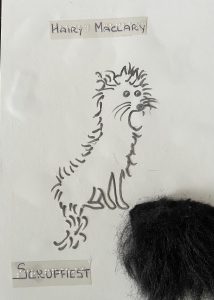
This graphic of Hairy Mclairy, (who looks like a Terrier) was created on special paper. Once the paper is drawn/printed on in black, a special machine is used to form a 3D outline, so it can be accessed by those with a visual impairment. Long black fur was added to represent the colour and texture of Hairy Mclairy.
Thunderstorm
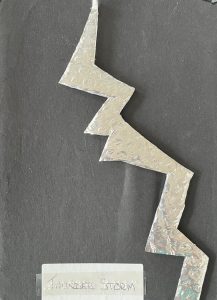
In a recent book I modified a character who was scared of storms. As a result, the picture above, has been shaped into a zigzag feature to represent lightening.
The material is silver with a slight shimmer.
Bottomley Potts, Hairy Maclary and Hercules Morse
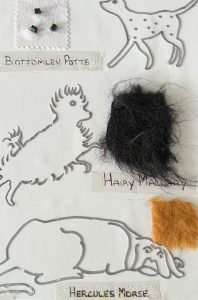
There are three outlines of dogs shown in the graphic, each one will now be described in further detail.
Bottomley Potts
The first dog (located on the top left) is a Dalmatian named Bottomley Potts.
After the raised line drawing had been completed, beads were sown onto a piece of white fabric, which was positioned just above the image to depict spots.
Hairy Mclairy
Located in the middle of the picture is Hairy Maclary. A character who appears throughout all the books. The image resembles a Terrier. The image was drawn on special paper which when passed through a special heater creates the raised line drawing.
A square of the same black long fur is located above the image in order to maintain consistency, enabling both visual impaired and a sighted audience to locate the prominent figure of these books.
Hercules Morse
The final dog is a Mastiff named Hercules Morse, who is another character in the same book. The outline was formed using the procedure previously described. Following which short orange fur was inserted above the image.
All these diagrams have been created by hand, and are designed to be appealing and fully inclusive to both visual impaired and sighted people.
Australia resources
For my latest project I was asked by a teacher of the visual impaired to modify and transcribe some topical resources on Australia, in order that their pupil could fully participate throughout the class topic.
As a result I adapted a book on Australia into braille and created a variety of tactile diagrams to enable the person to comprehend the various images shown in the original book. These adapted models/pictures are shown below.
What is a continent map

In the text of the book that I adapted there was a section that explained about continents and where each one was located in the world via a map.
Therefore I produced a simplified map which was outlined on the special paper called Swell paper, with specific black marker pens, then passed through a heater as described previously to form the raised image.
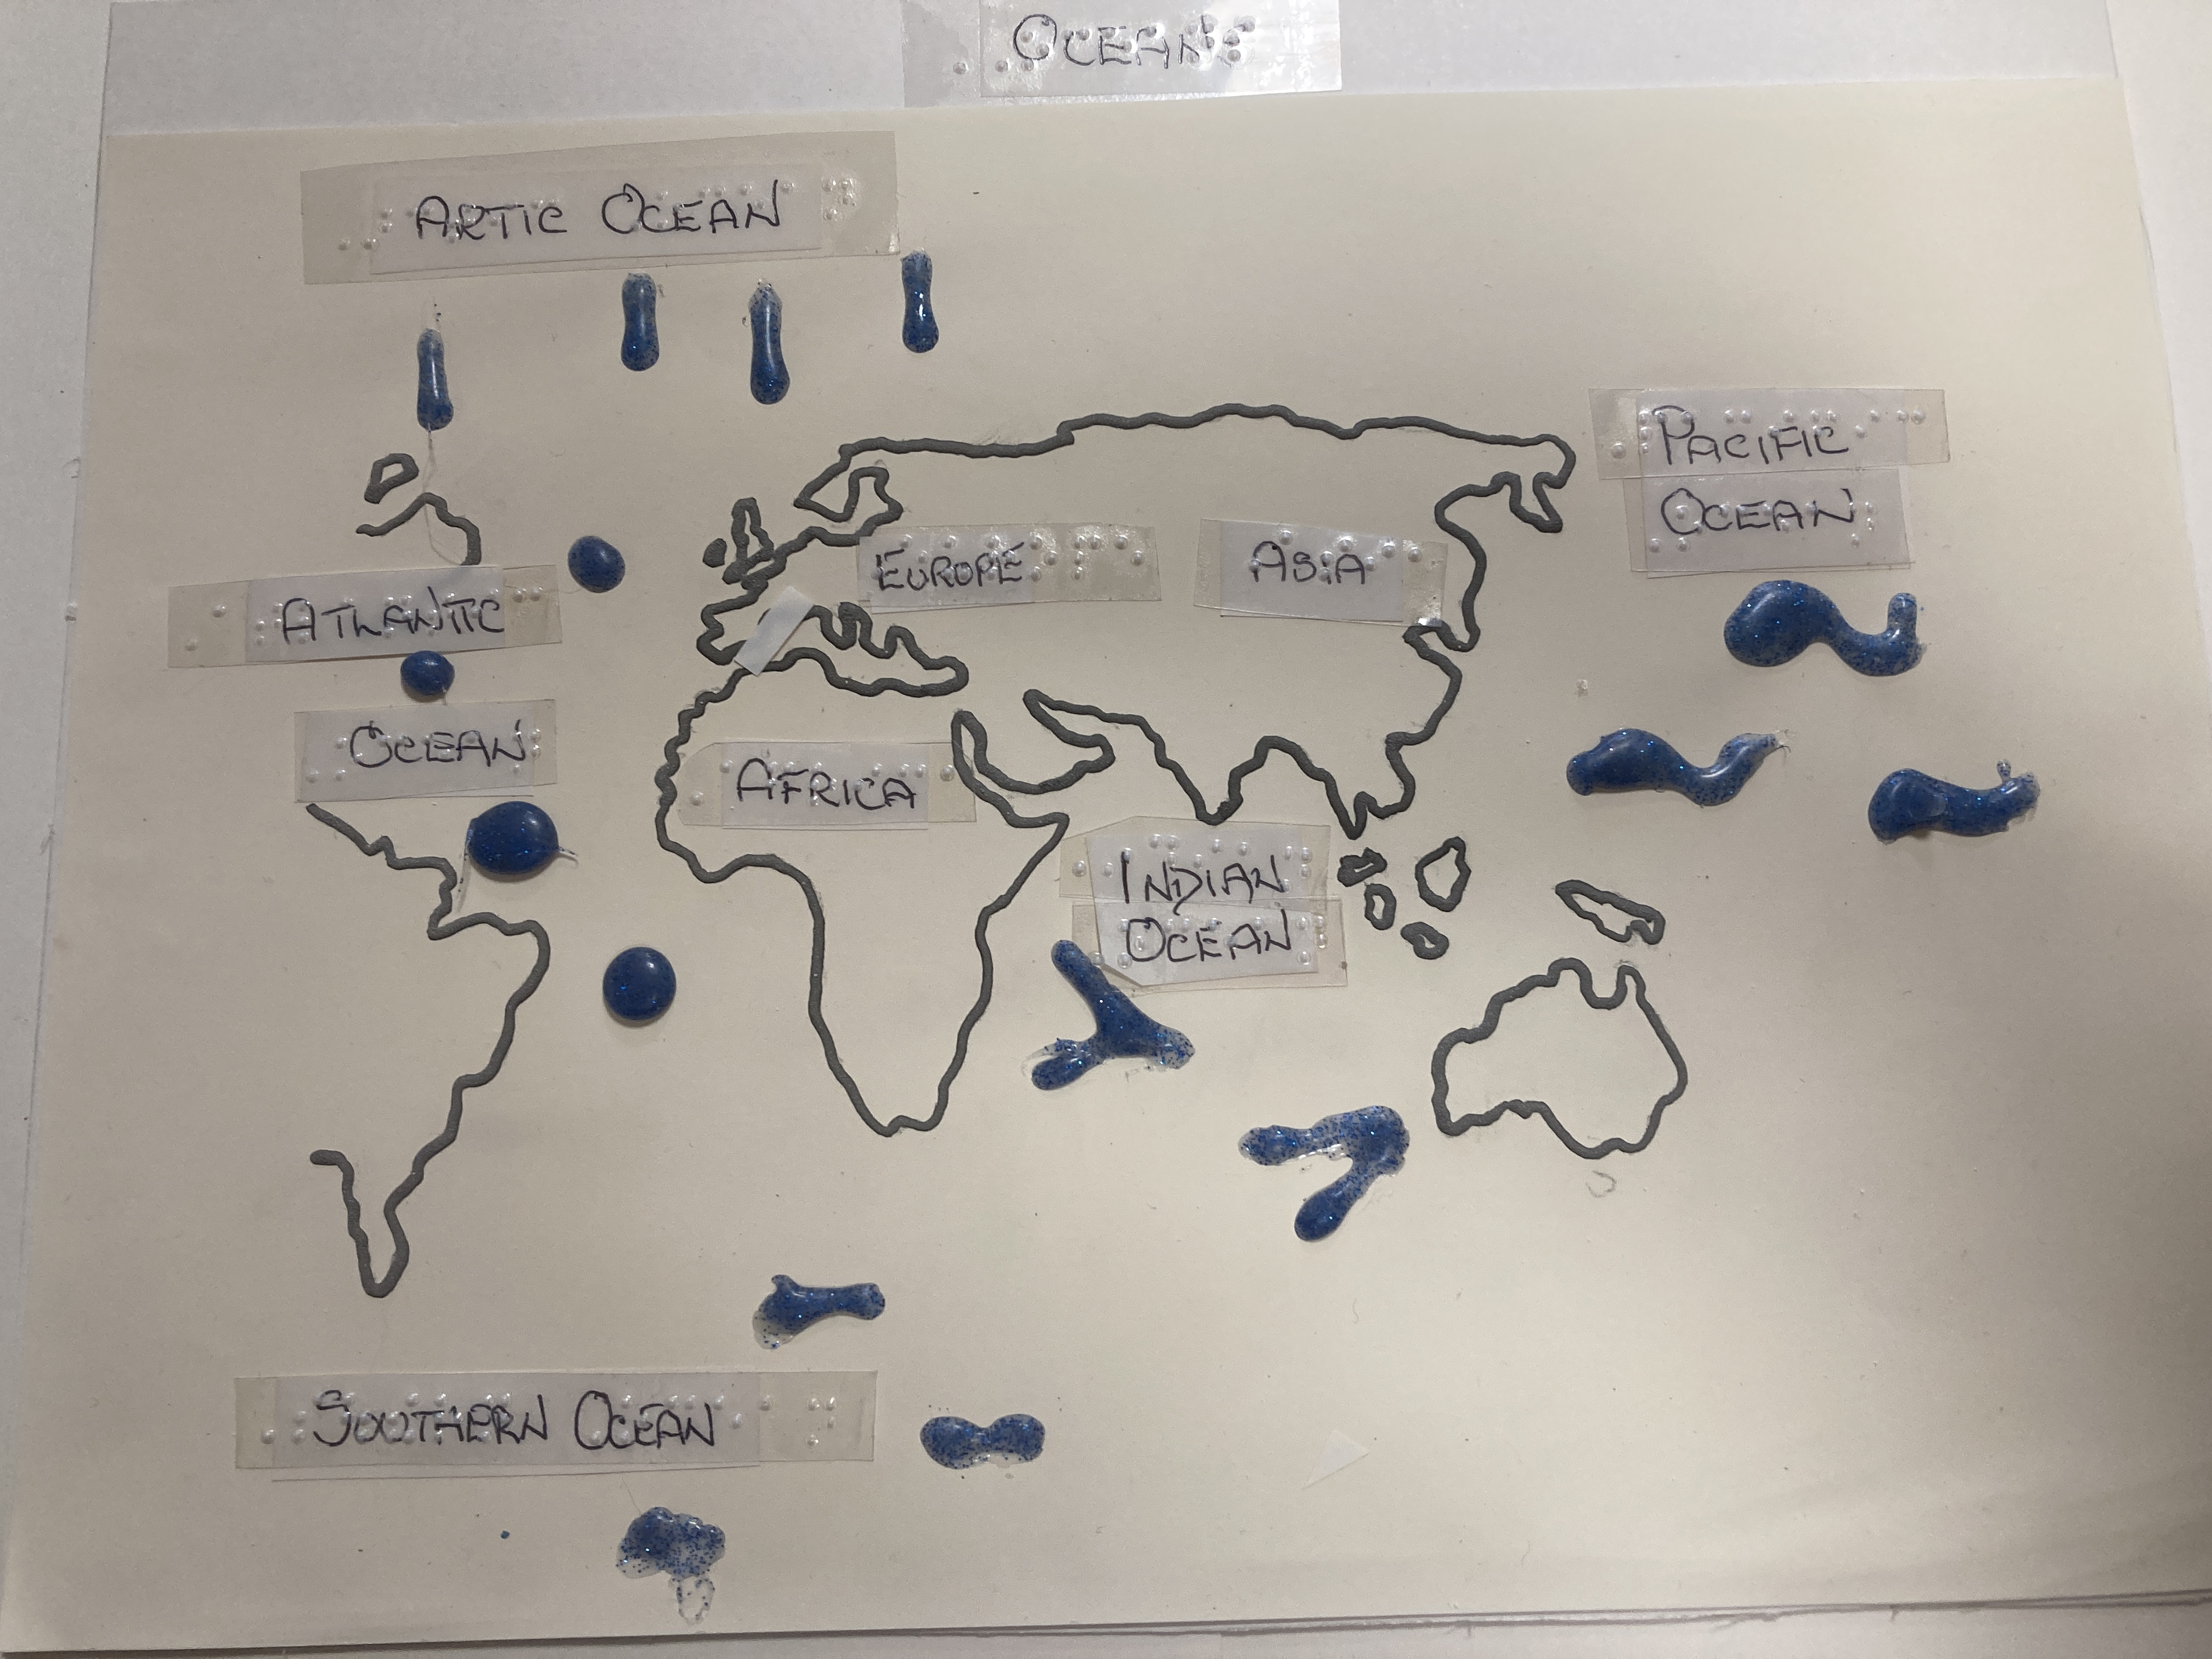
Once the raised graphic was made, braille and print labels were added to indicate the names of the continents, permitting both visual impaired users and sighted users to acquire knowledge of what continents are and how they are positioned, for example Europe is the top continent displayed on the tactile map.
In addition, cream coloured velvet ribbon was add to denominate the Equator and divide the continents, plus aid navigation.
Ayers Rock
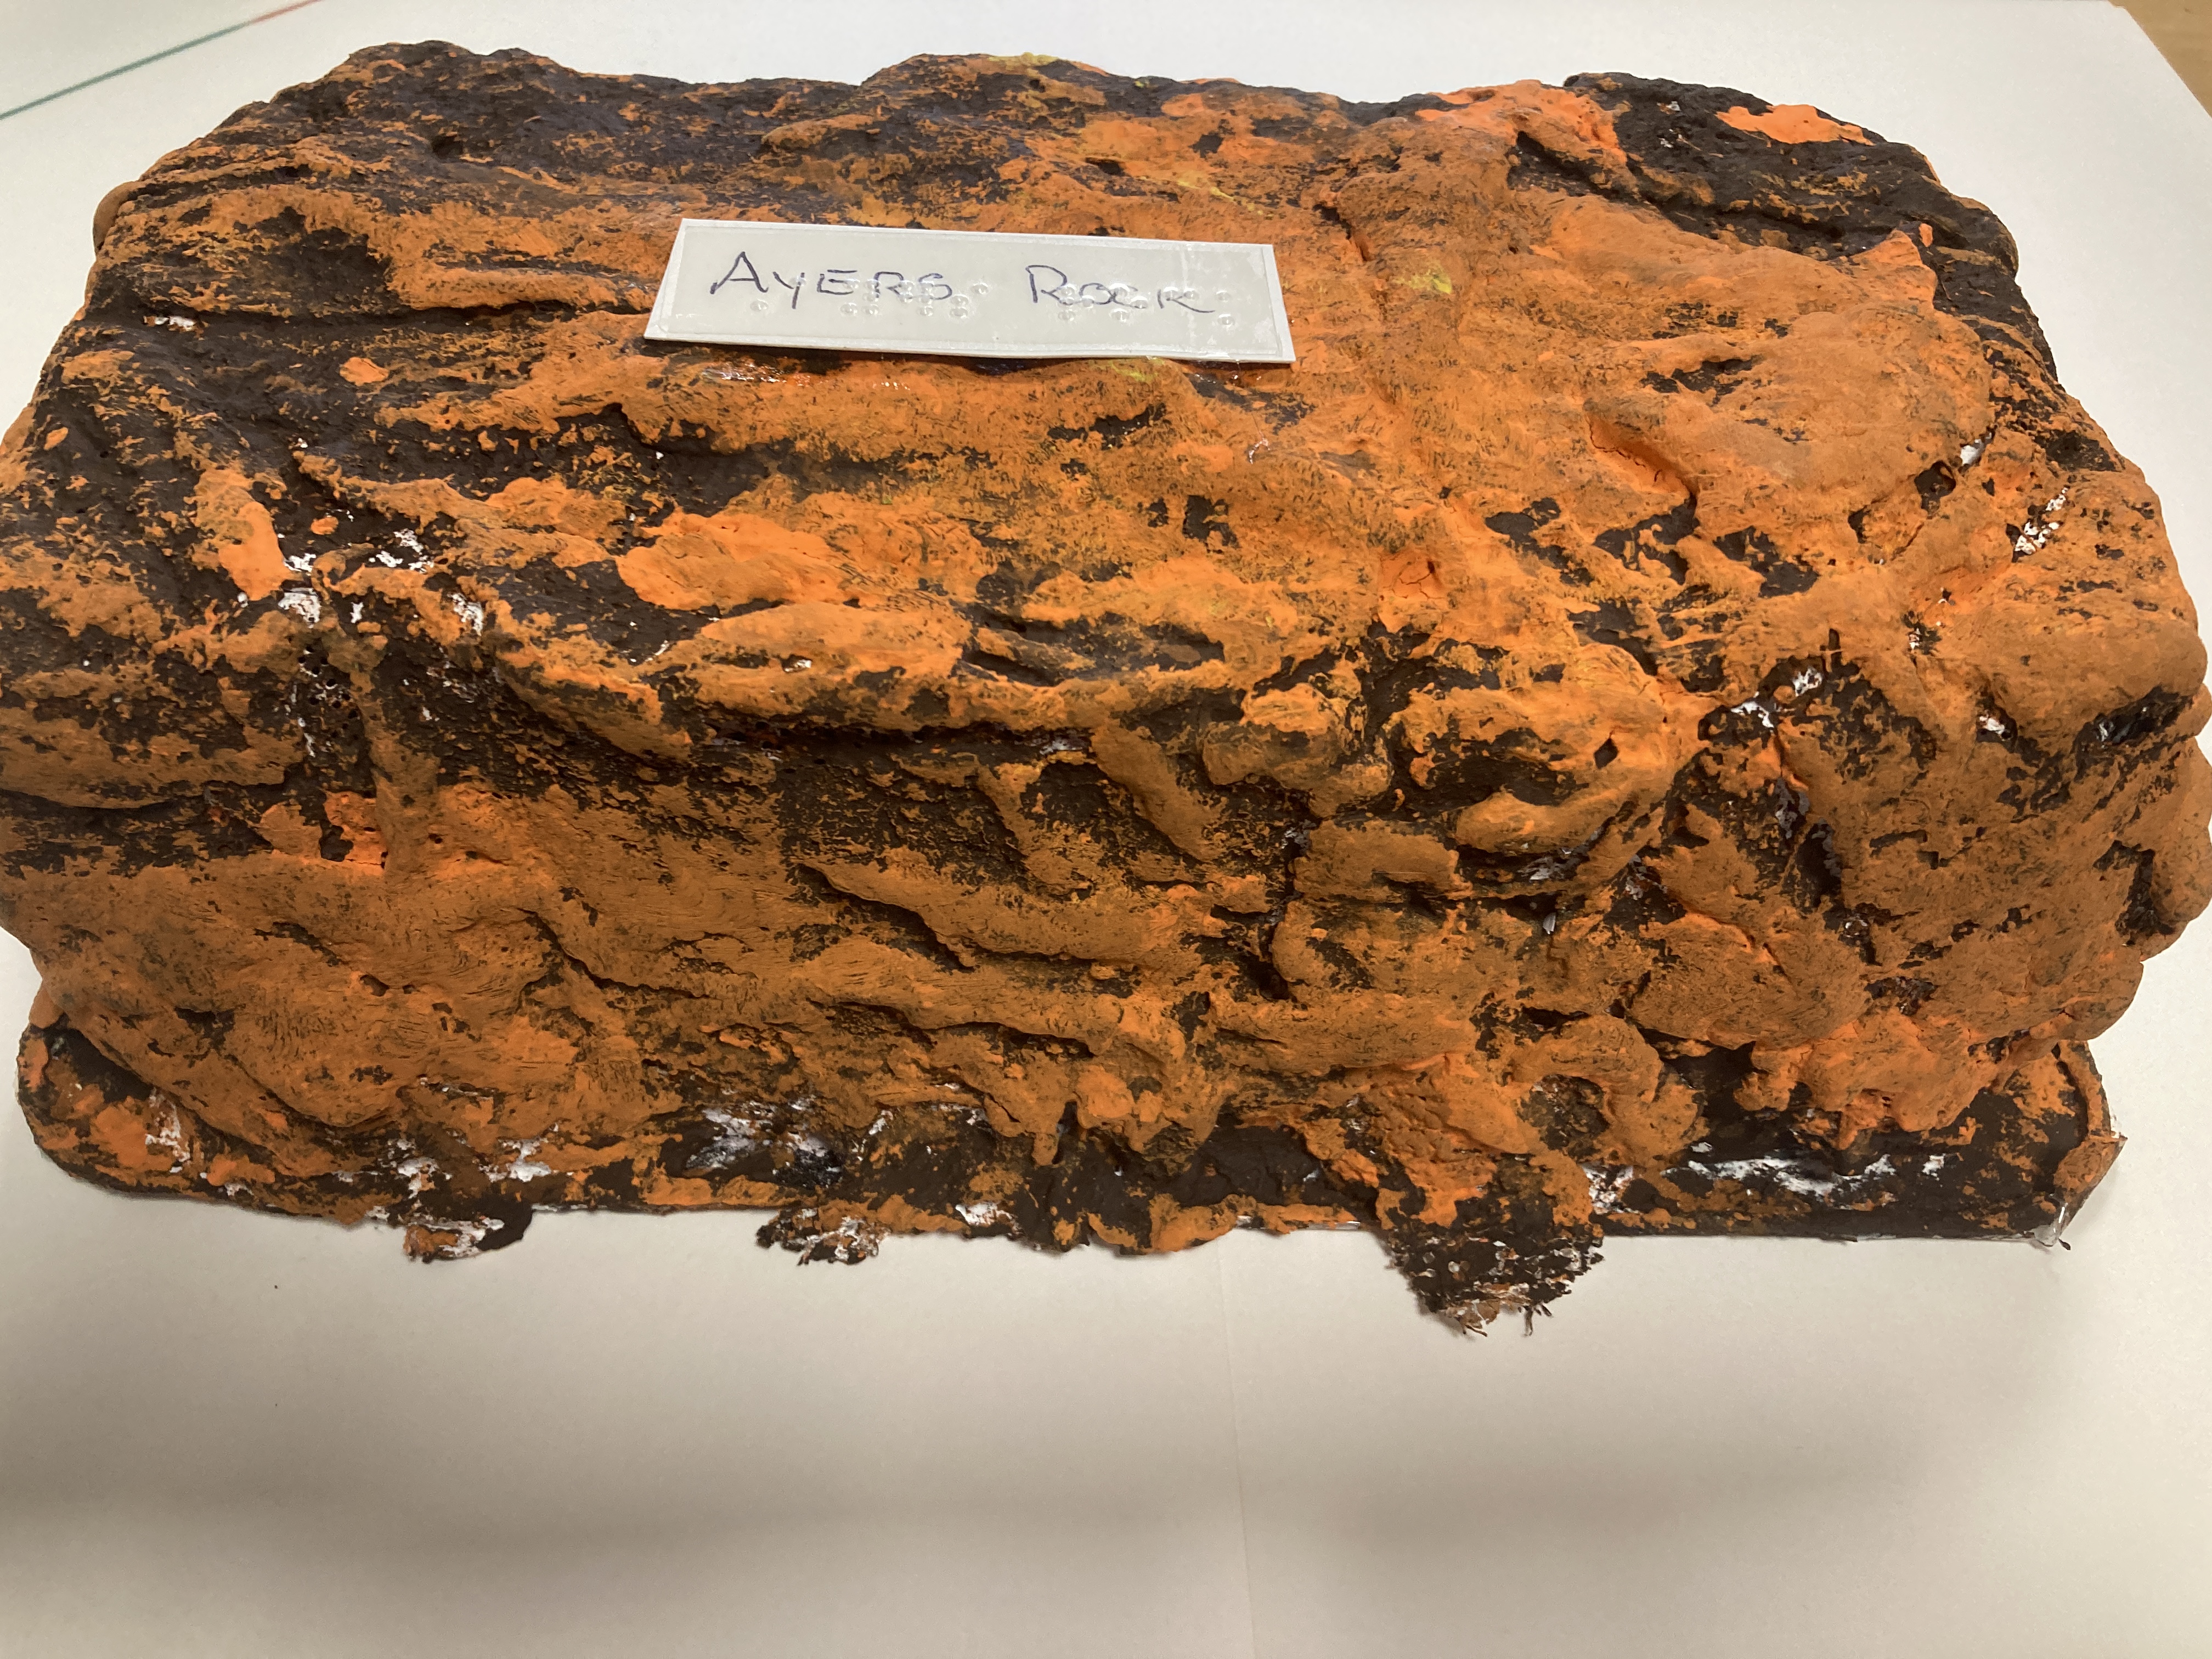
On the same page of the book that informed the reader about continents, there were several iconic landmarks which are unique to Australia. Among these the famous attraction Ayers Rock.
As a consequence I created a model that could be felt tactually, by using a plastic tray as a basic shape, which I then covered with Mudrock (Bandages of plaster of Paris) before finally painting the model orange to represent a sand stone finish both in colour and texture.
Coral
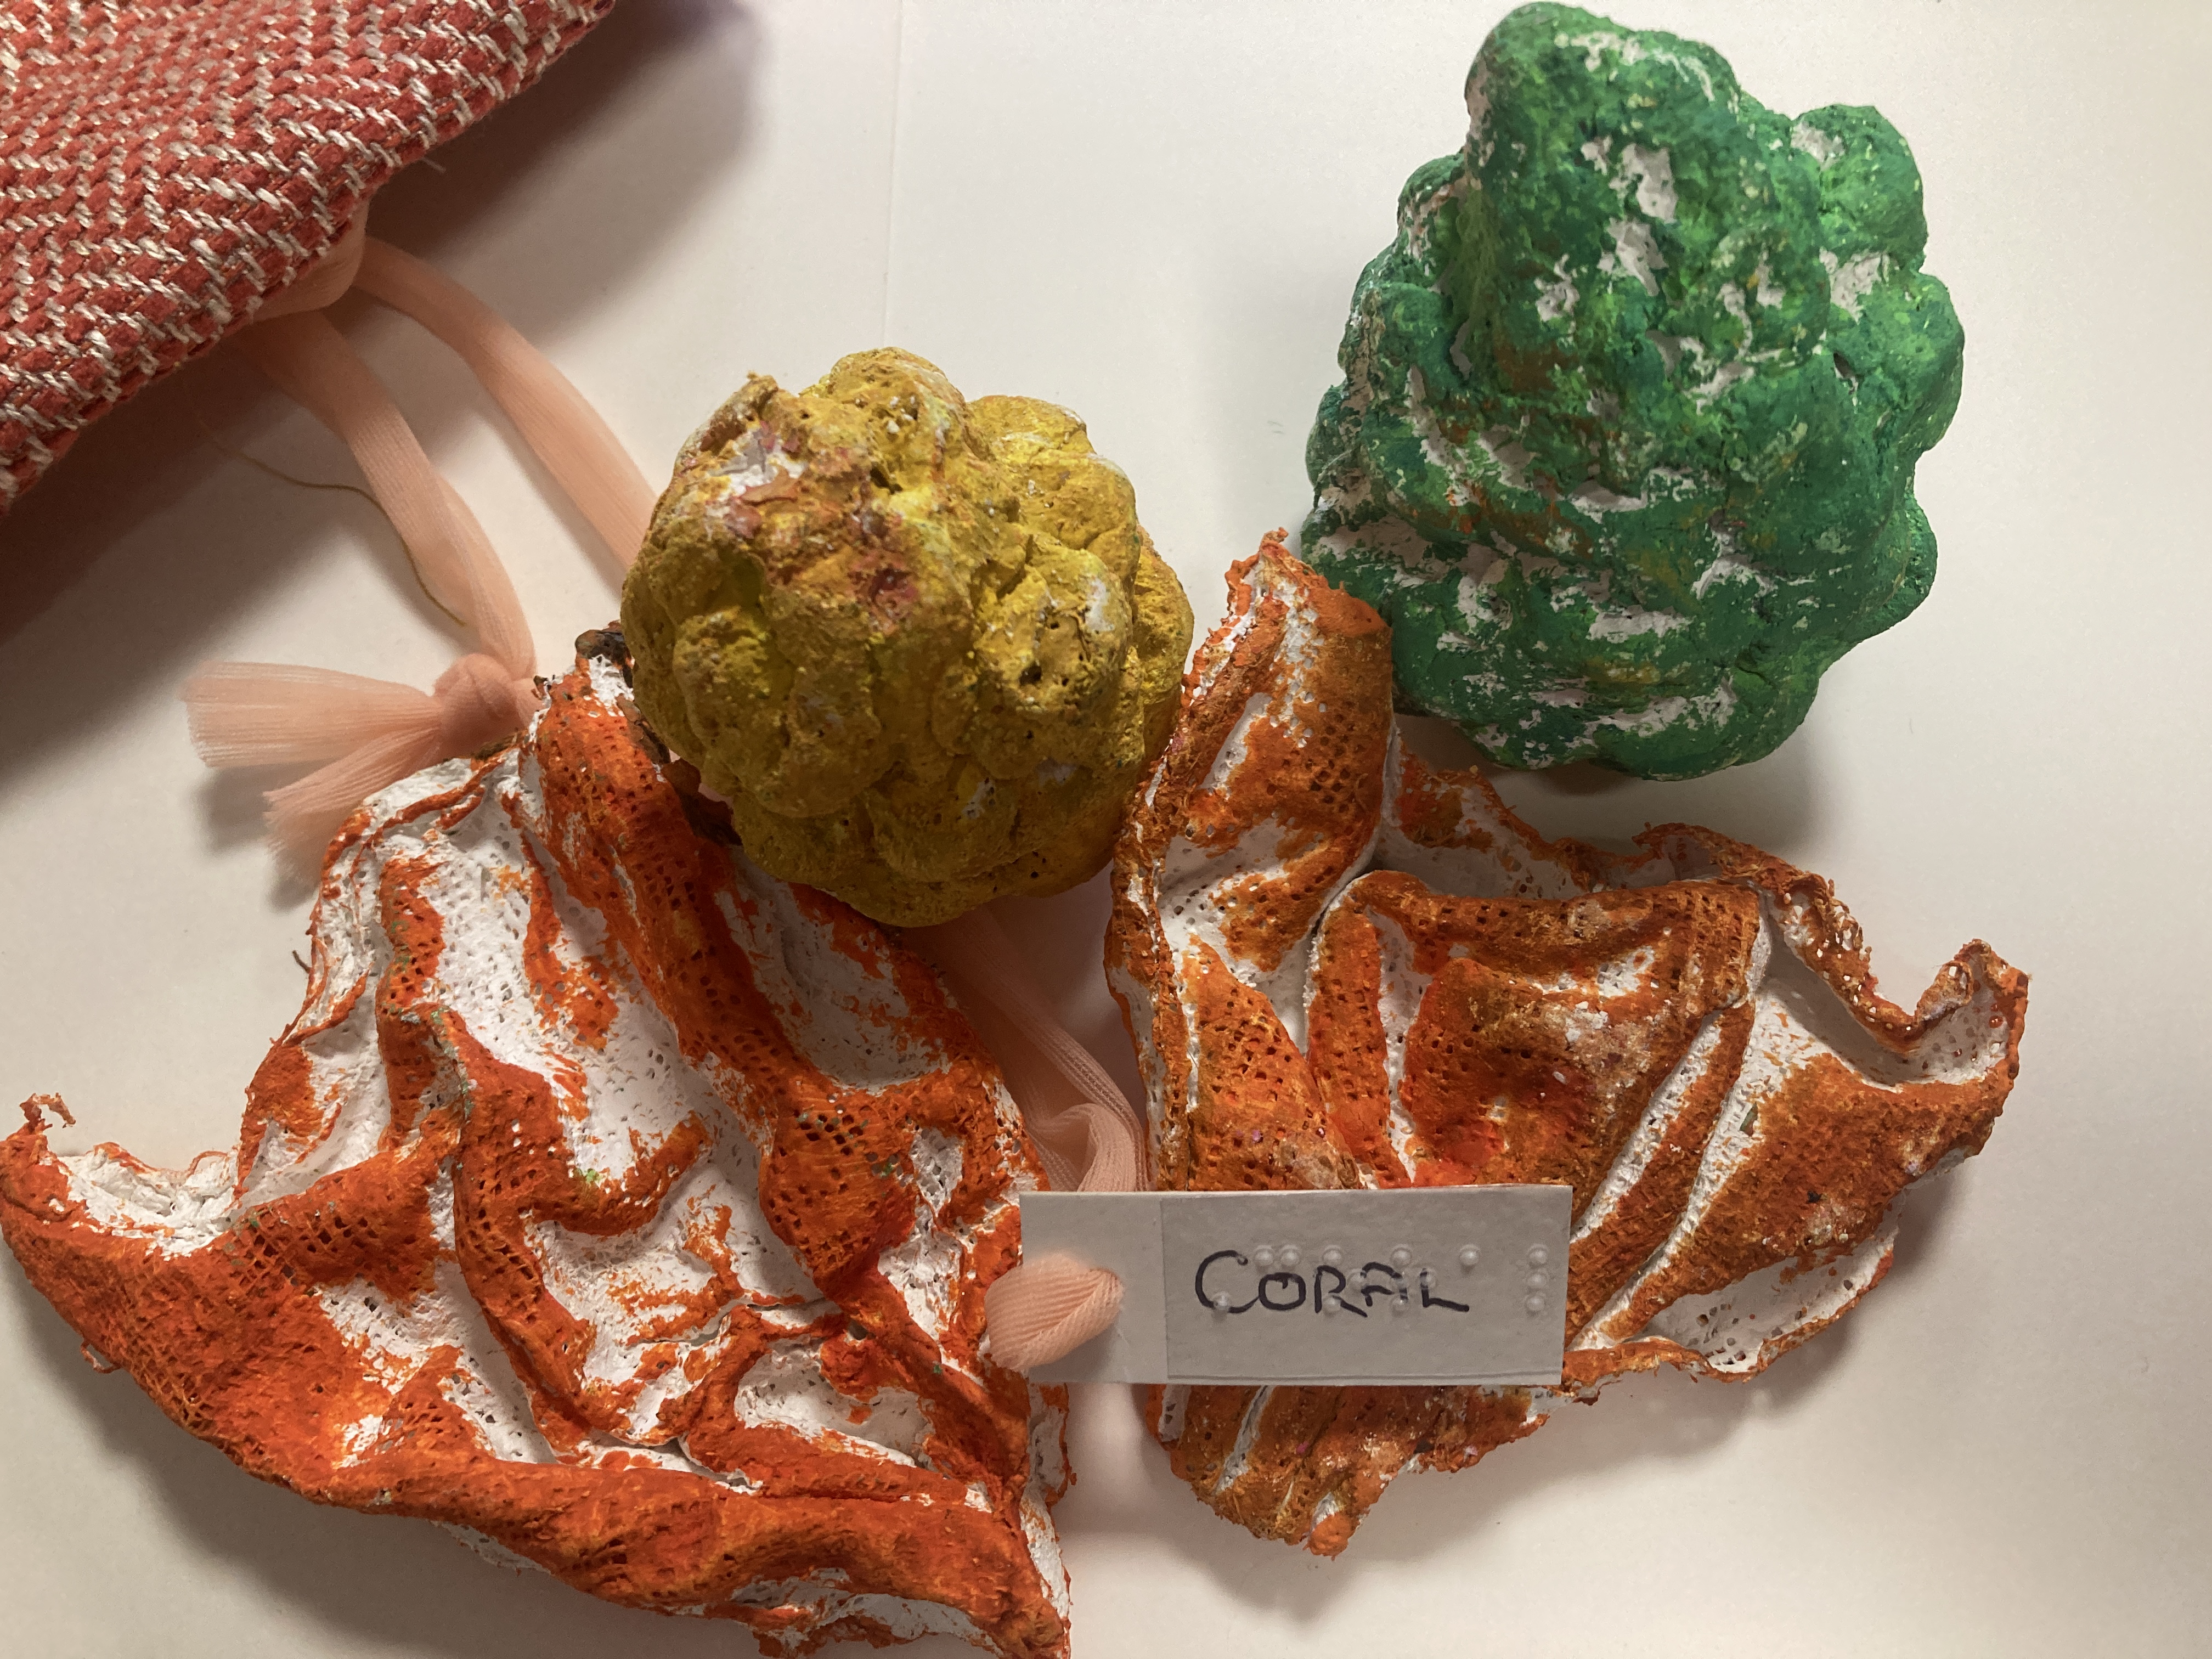
Due to the fact that the Great Barrier Reef is one of the famous natural wonders of Australia, I’ve created some coral as this is often found upon the Great Barrier Reef.
This process was achieved using pinecones as these formed a sturdy base and were a variety of shapes, which meant they’d be more appealing to both my targeted audience. Next Mudrock was wrapped around the shapes to give more texture and solidity, once dry they were painted different shades of colour.
Finally a material red and white bag was created using cross stitching to add texture.
Sydney Opera House
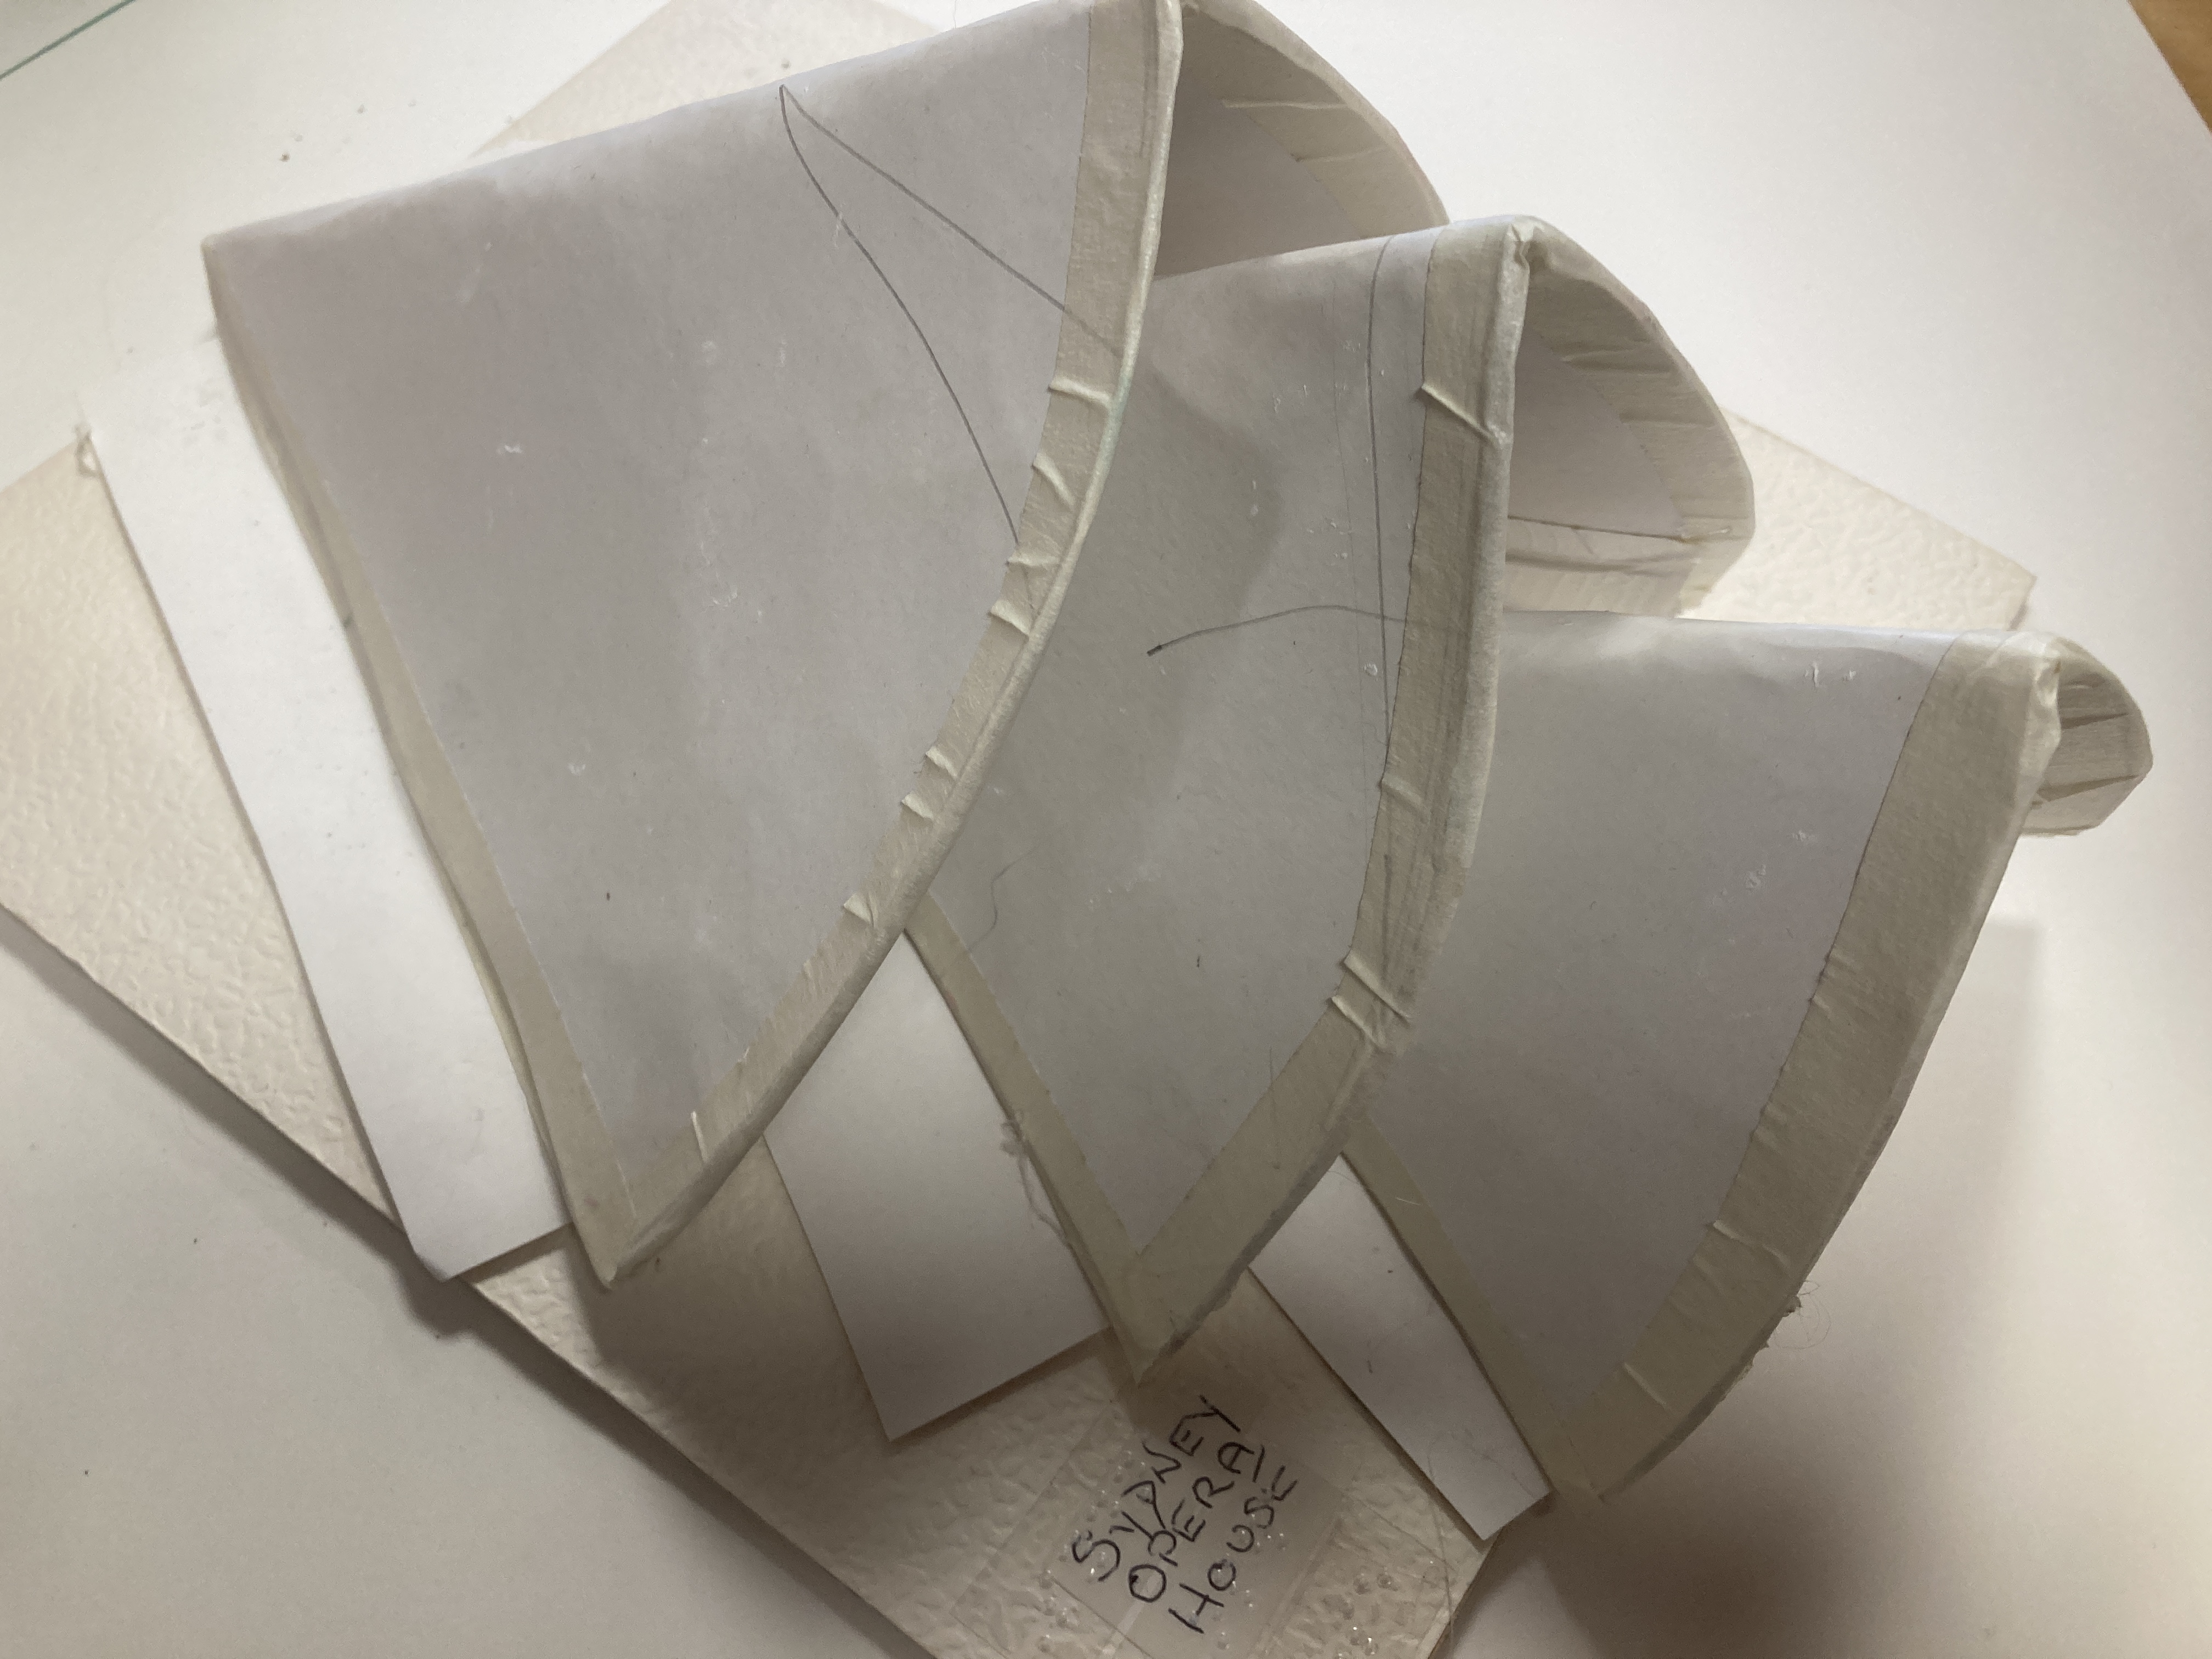
The most well-known building in Sydney is of course the Sydney Opera house. Therefore I produced a a 3D model of this monument.
To form the skulture triangles were cut out of cardboard, then folded in half. Next a layer of Mudrock was placed in between a second layer of card to help keep the required mould.
Afterwards a final layer of card was put on the top.
Line drawing of Kangaroo
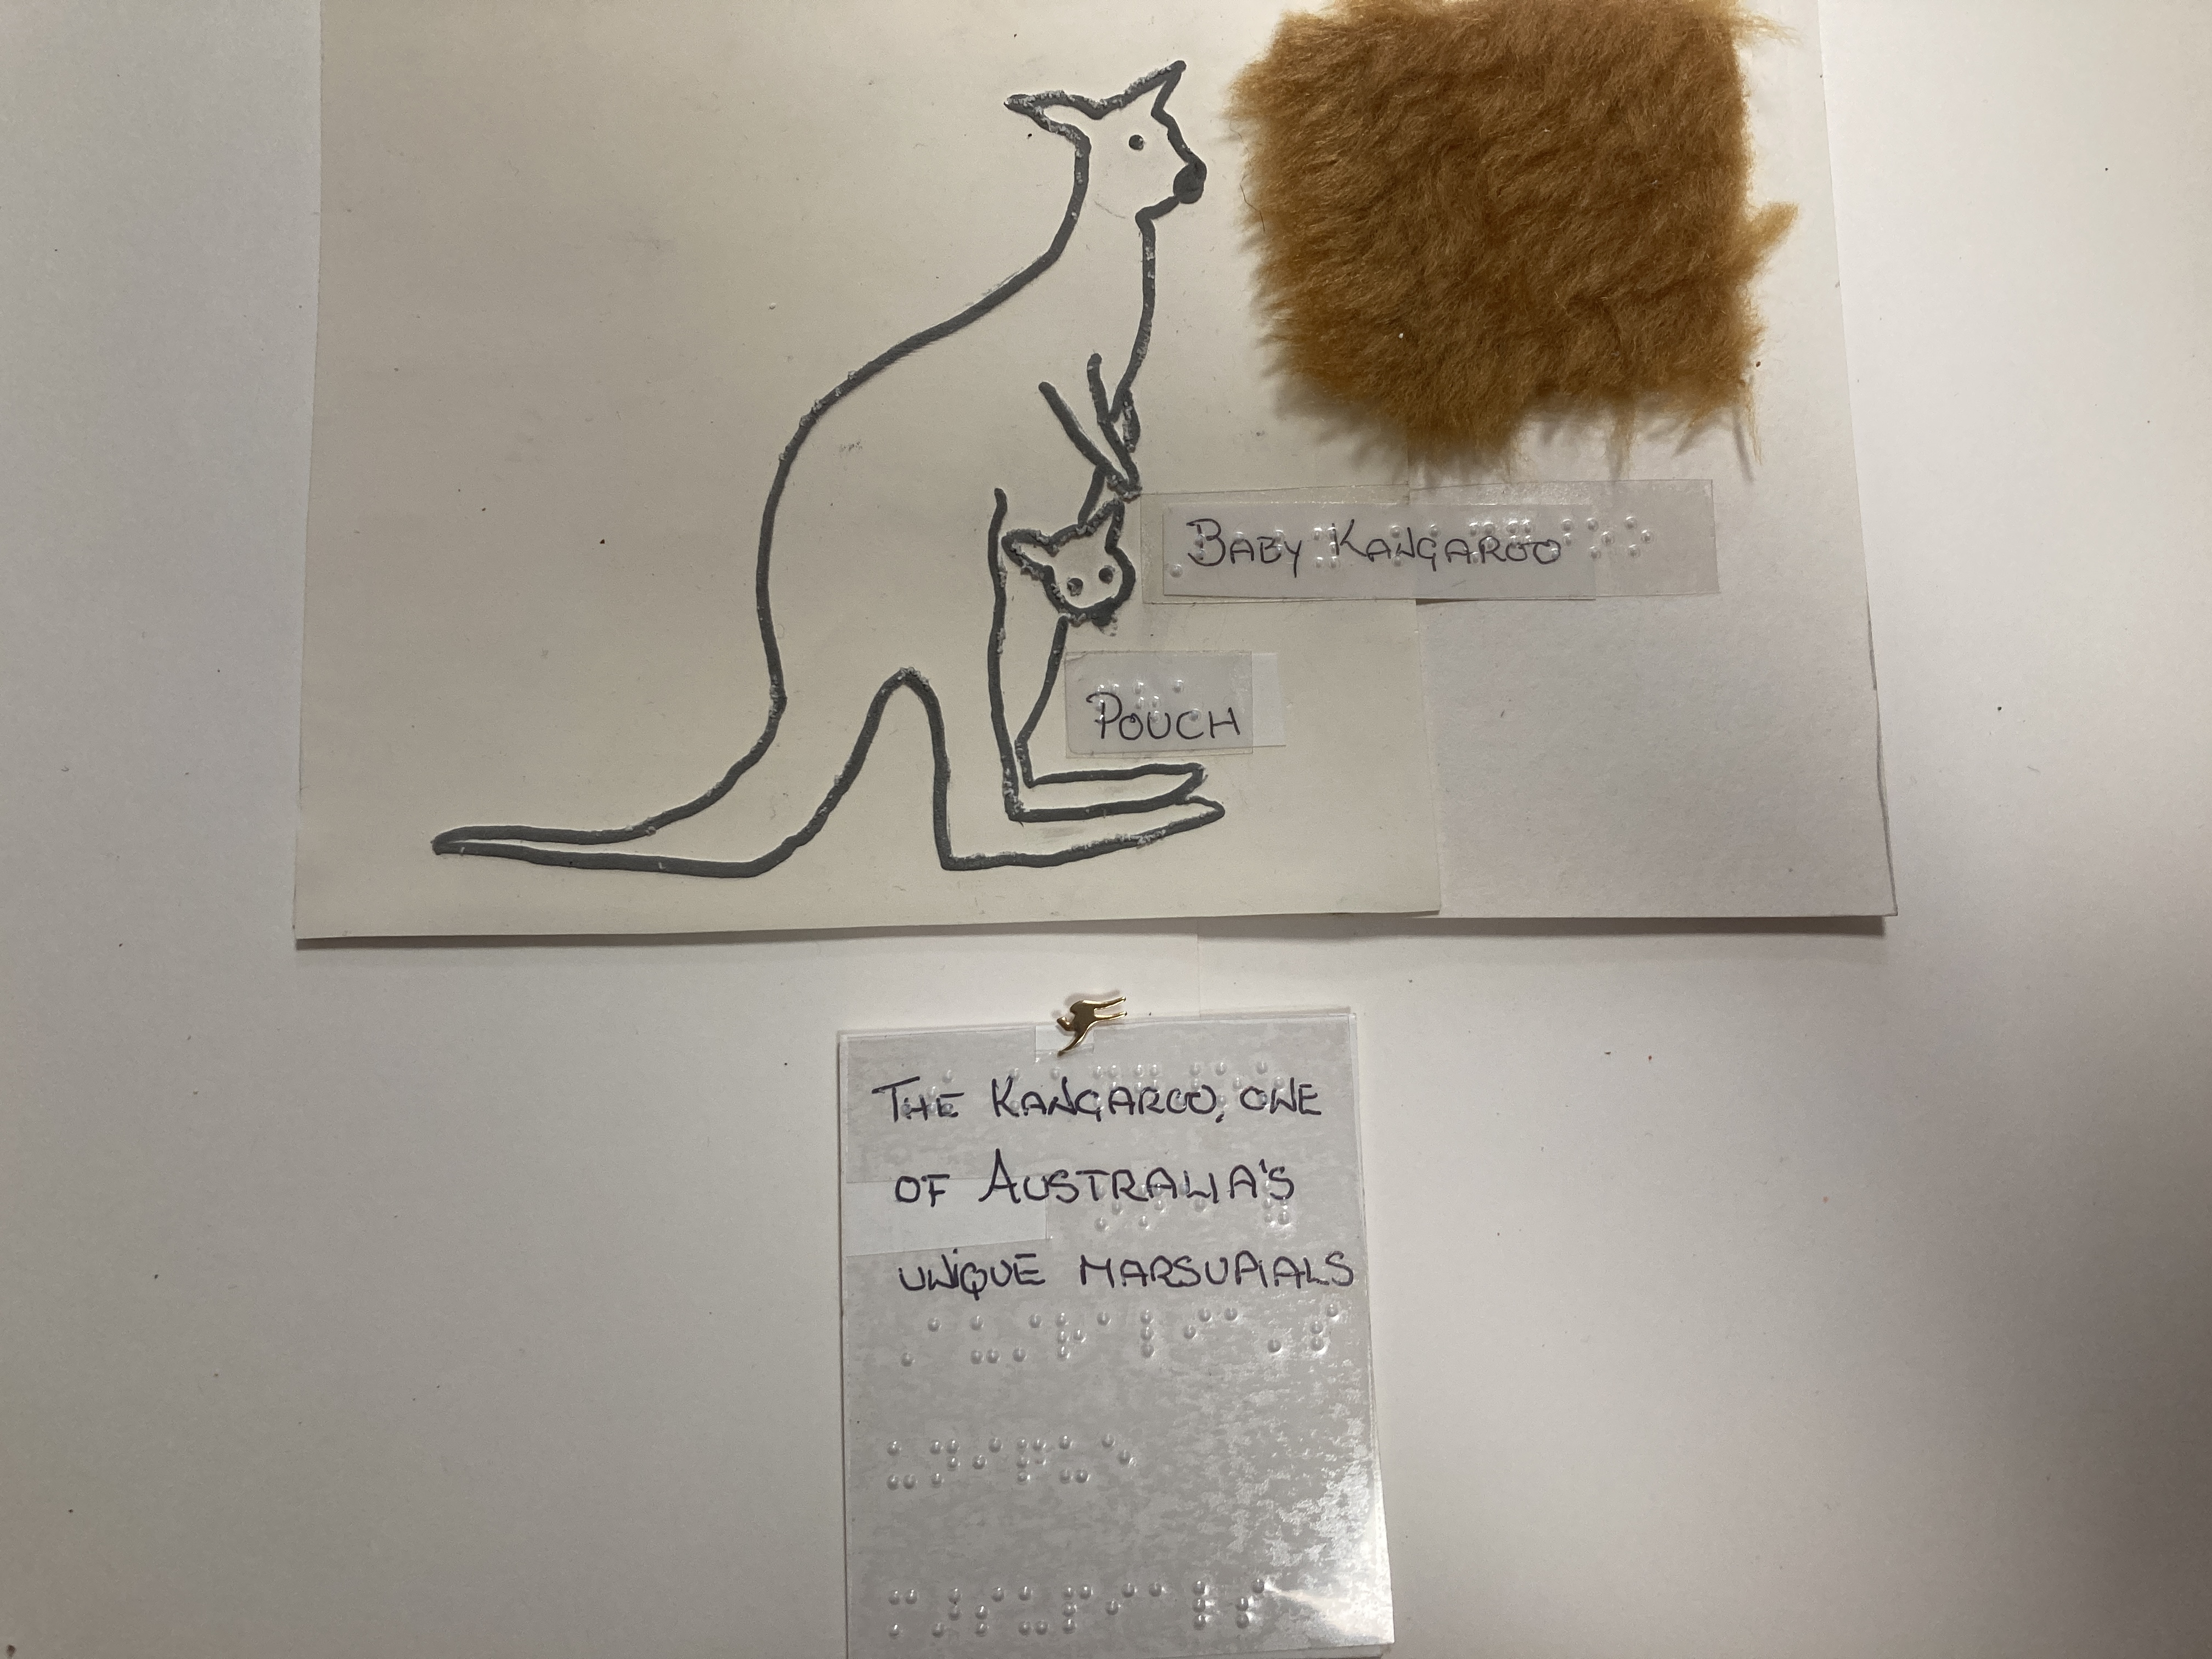
Due to the fact that Kangaroos are a much loved part of the Australian wildlife, this raised diagram was produced using the same process as the map, to depict a mother kangaroo who is carrying a baby in her pouch.
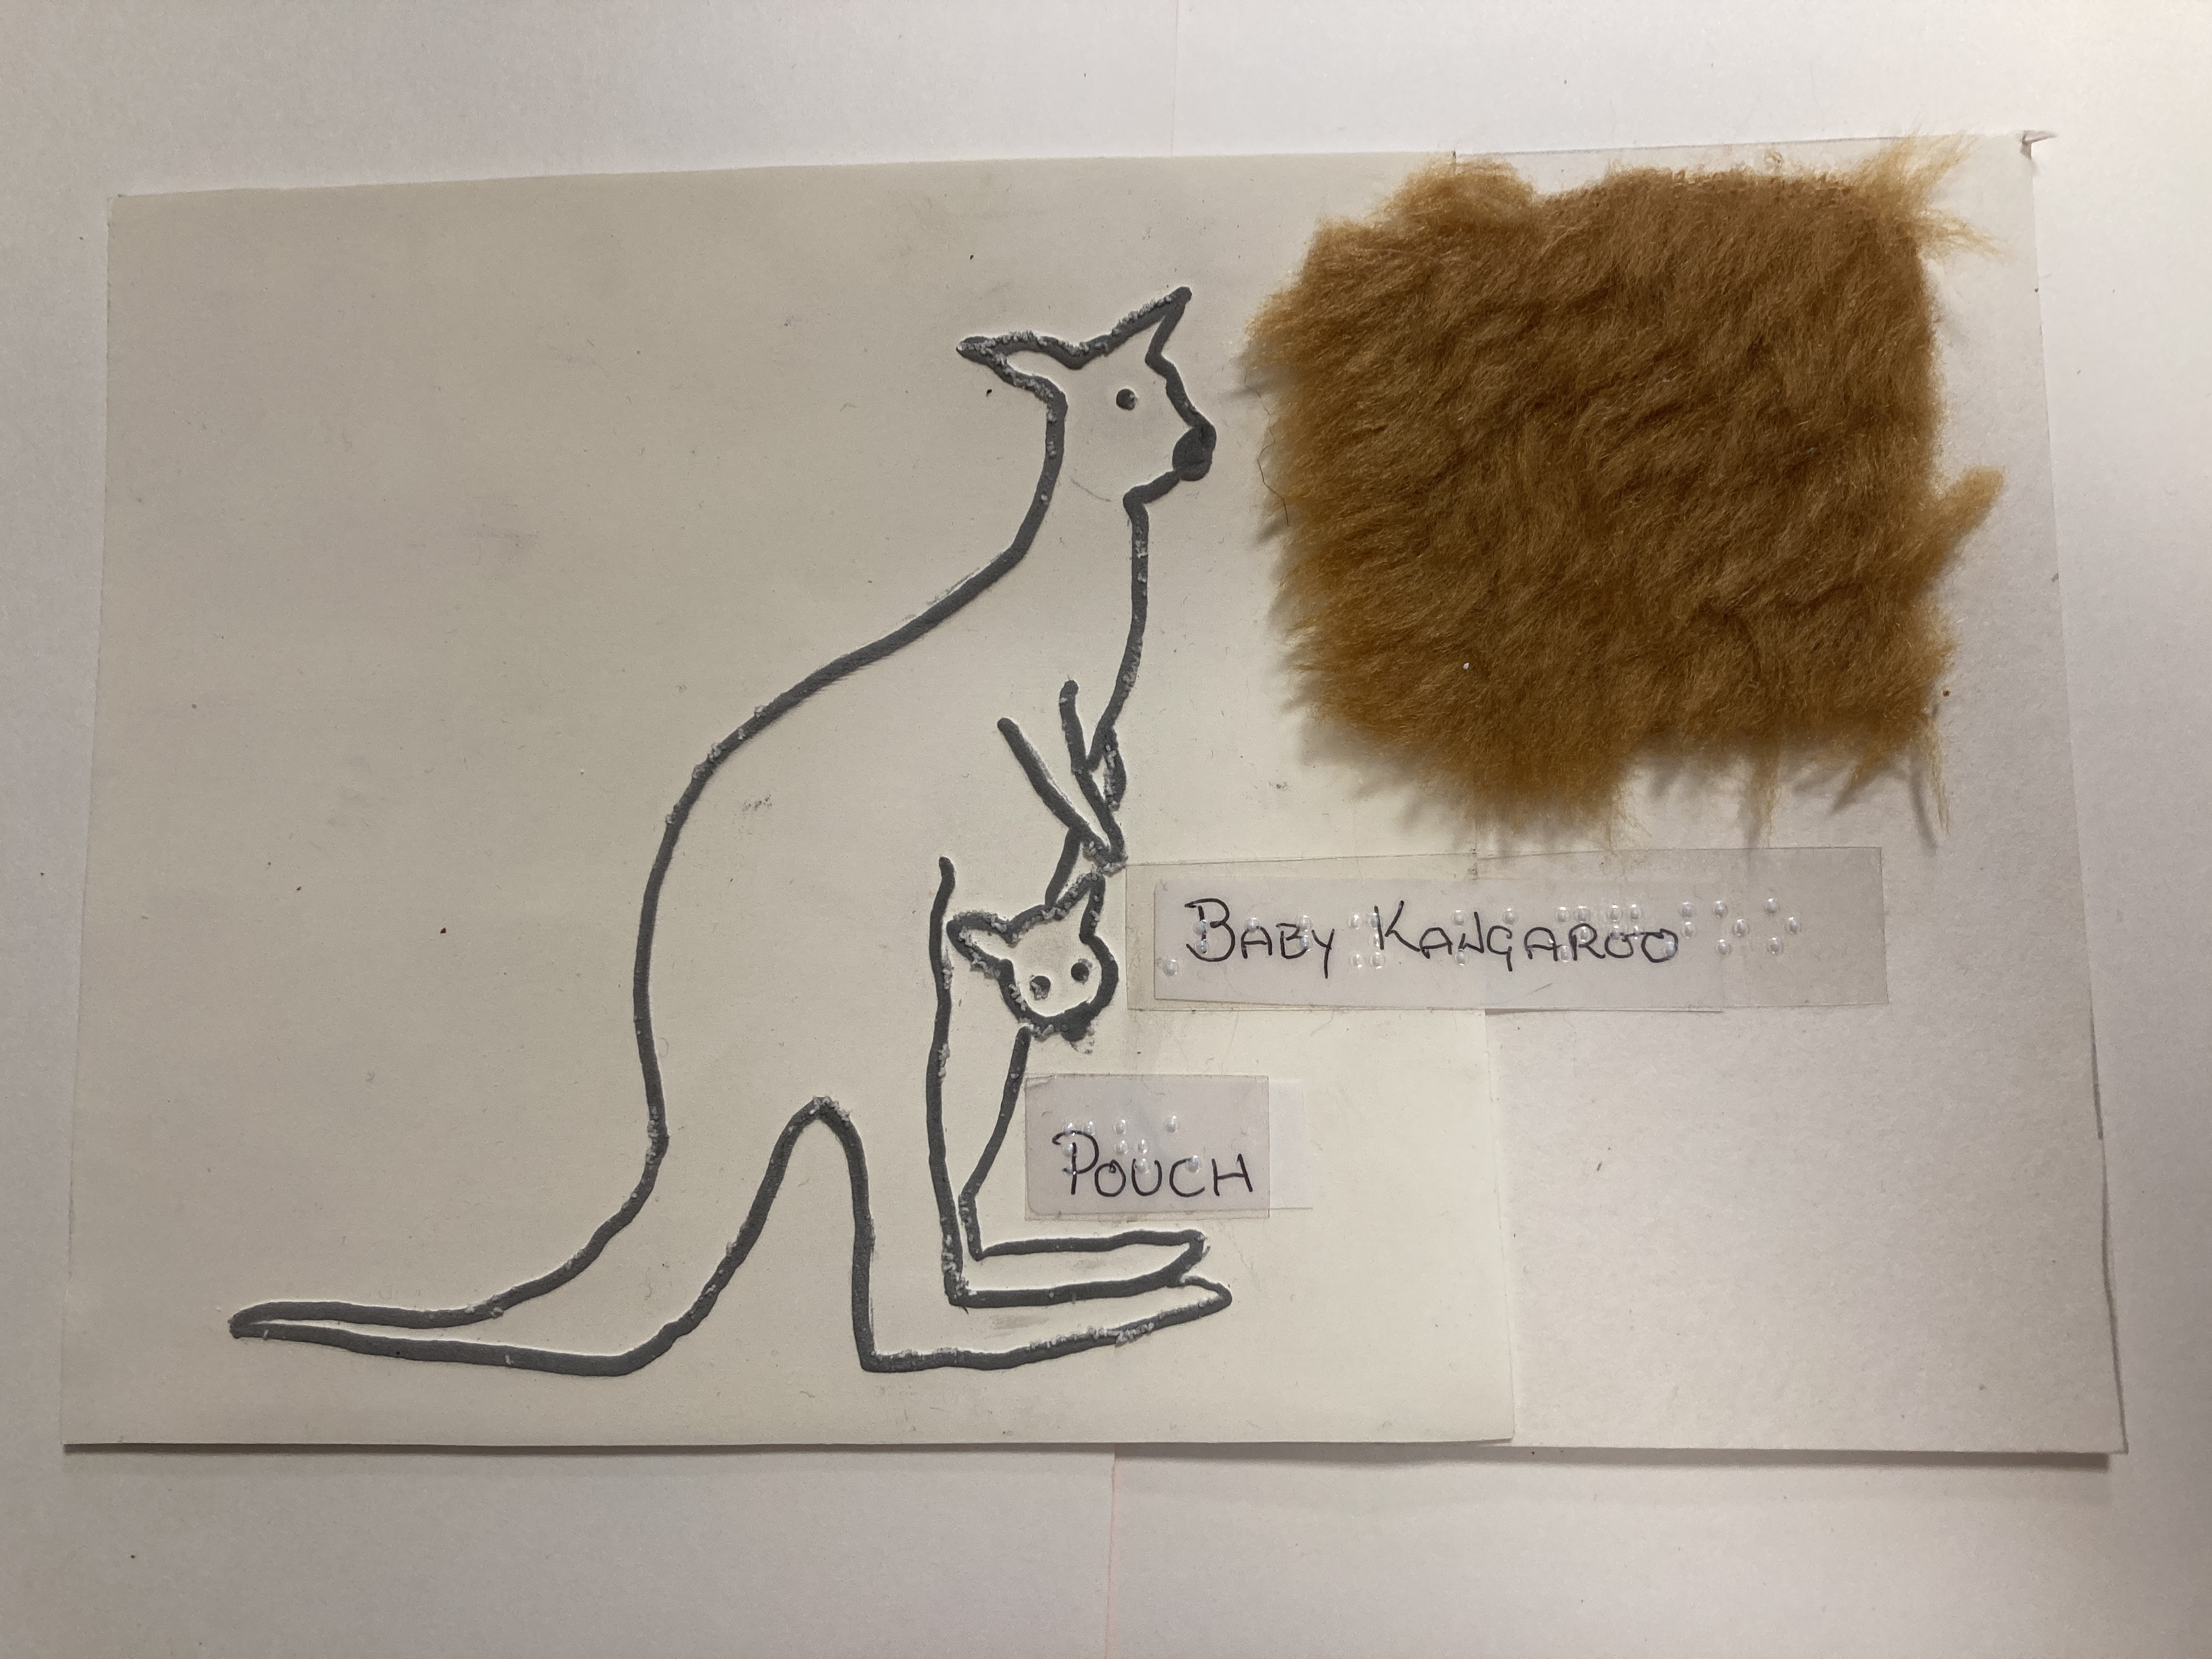
Afterwards brown fur was inserted beside the raised image to represent the colour of a kangaroo’s fur.
Settlements
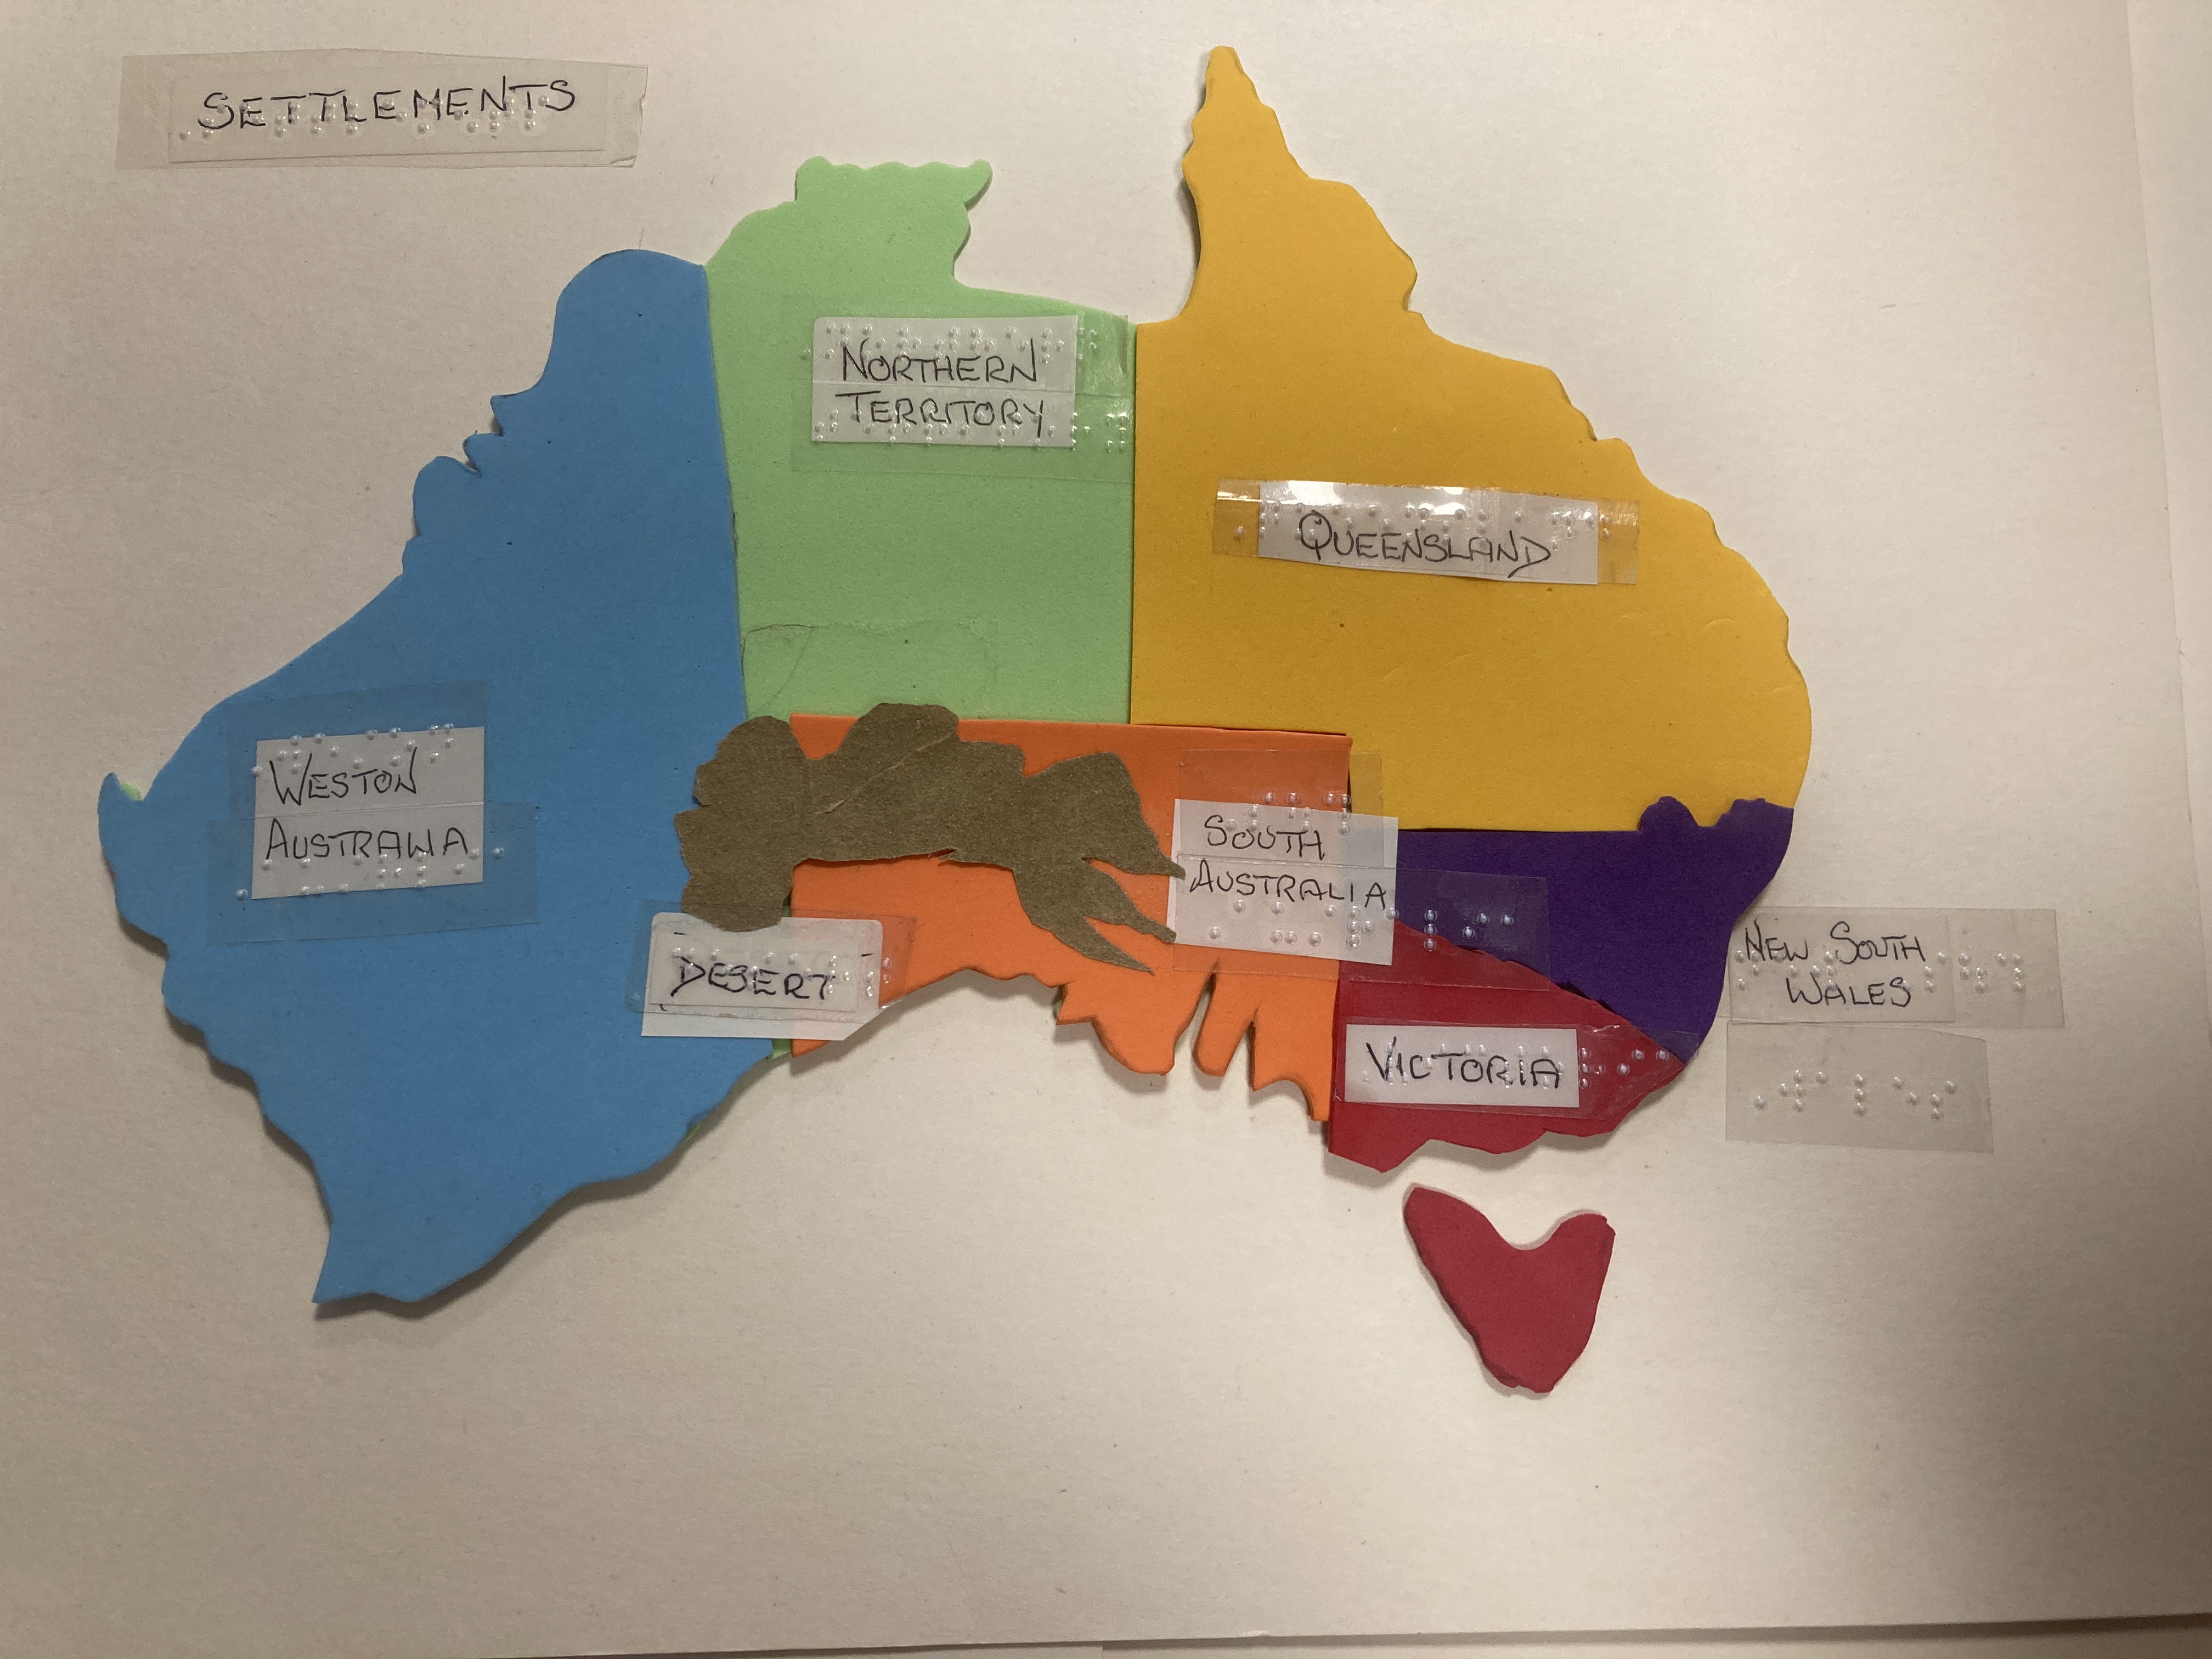
In another part of the text that I transcribed there was a section on settlements where each settlement was highlighted to indicate the various states of the country.
I adapted the map by forming the shape of Australia out of foam. Due to the fact the client had some colour perception, diferent colours of foam were used so that the different settlements could be identified easily and efficiently. For instance Western Austrilia is blue.
Stone age Project
I am still assisting the same teacher of the visually impaired by providing more resources to enable her student to access both the curriculum topics, and leisure reading materials.
The teacher informed me that after the summer, the pupil’s class topic would be the Stone Age. As a result, she requested both stories and information books to be adapted into braille.
I decided to do a book from a series called Racing Ahead with Reading, which is the next series up from the Oxford Reading Tree.
The books I have chosen are “Little Nut’s Big Journey” and “Brother Trouble. Both of these stories feature a family who lived during the Stone Age. the family are moving into a cave but face many obstacles along the way during their adventure.
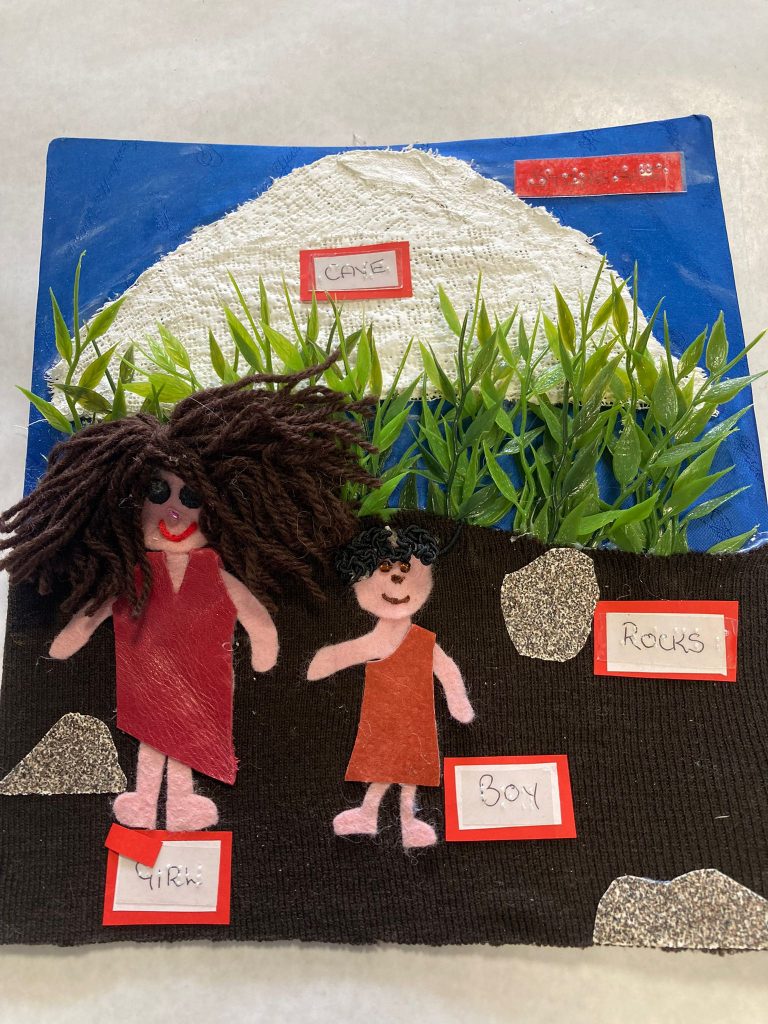
The photo above shows a tactile representation of the cave, as well as the scenery in the background.
First, a sturdy piece of card was covered in blue shiny fabric to represent the sky.
A round piece of fabric was used to represent the soil.
An object that is of extreme significance both at the end of the story and in the image which accompanies it, is the cave, where the family eventually move into. To ensure this stood out in my tactile graphic, strips of mud rock were cut and moulded into the correct shape.
Once this was done, to further enhance the background some plastic greenery was added to represent the foliage, and to provide more texture and colour.
After finishing the scenery, I decided to create the Stone Age family that are featured throughout the books.
Using pink felt, I first cut circles for face shapes, then sewed buttons on these to represent the eyes, nose, and mouth. I then wrapped loops of wool around some card to make long loops of hair for the girl. The boy’s hair was represented using crocheted elastic to provide a rough effect.
The rocks in the picture were represented using sandpaper to provide a rough surface.
Horrid Henry’s bake off

Another series which I was given to modify was the much-loved Horrid Henry books by Francesca Simon.
I decided to adapt a story called “Horrid Henry’s Bake-off.”
The story is about a baking contest in which the whole neighbourhood takes part. The two main characters who are rivals Horrid Henry and Moody Margaret are determined to win and prove to one another that their cake is good enough to win a place on the judge’s TV show. They choose to make the same chocolate sponge cake, but then ensure they ruin each other’s cake so that it is actually Perfect Peter henry’s brother who wins.
To enable the shape of the chocolate sponge cake to be more realistic and accurately represented, I decided to produce the cake in 3d.
A silicone cupcake case was filled with Papier-mâché and moulded into the correct Shape. before leaving the Papier-mâché to set completely, a circle of lite brown material was placed over the cupcake case and tucked in at the sides of the case.
This fabric was used to add texture to the end result. It also enabled me to provide a more rounded shape and to mimic the colour of a real sponge cake.
Because the student has some vision, I used coloured hot glue to create the icing. Finally, a bead was inserted in the centre to represent the cherry which was shown as a key element in the original cake image within the book
Making a bolt for it by Roderick Hunt
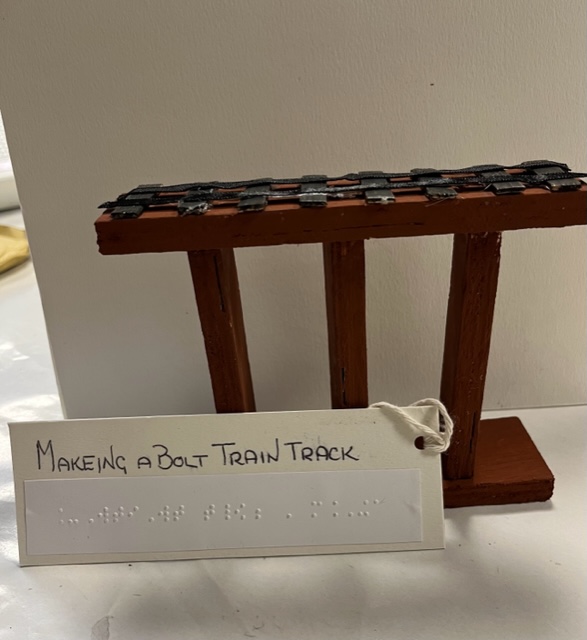
I was asked to make a 3D sculpture inspired by the book Making a bolt for it by Roderick Hunt. The famous characters Chip, Kipper and Wilma hunt down the vigilantes who are trying to destroy the train track which is a historic landmark.
First, I cut out 3X lengths of timber, two for the upright portions, and one for the bridge top. I then painted them using brown paint. For the train track, match sticks were cut to the width of the bridge. I painted them black and glued them together making sure they were evenly spaced across the top